FIRMWARE UPDATE

KINETIC LAB-Link Updater — User Guide

This guide explains how to update the firmware of the dedicated sensor using KINETIC LAB-Link Updater. It takes about 10 minutes (the file transfer itself takes a few minutes). A Windows PC is required.

Note: The app and Windows screenshots show the Japanese UI. Button names are given as “Japanese label” (English translation) — e.g. “更新開始” (Start Update).

Video guide

Video guide (about 3 min)

🔇 This video has no audio. Instructions are provided as captions. Duration 3:03

The same content is available as text and screenshots below. If the video does not play, you can also open the video file (MP4) directly.

PREPAREWhat you need

  • 1Windows PC
  • 2KINETIC LAB-Link (dedicated sensor)
  • 3USB cable (USB Type-A ⇔ USB Micro-B)
  • 4Update package “Lab-Link_Update****.zip” (download it in advance as instructed by support)
  • 5Updater app “Lab_Link_updater.exe”

STEP 1Prepare the update package (ZIP)

  1. Save the downloaded “Lab-Link_Update****.zip” to any folder.
  2. Right-click the ZIP file and select “すべて展開...” (Extract All) from the menu.
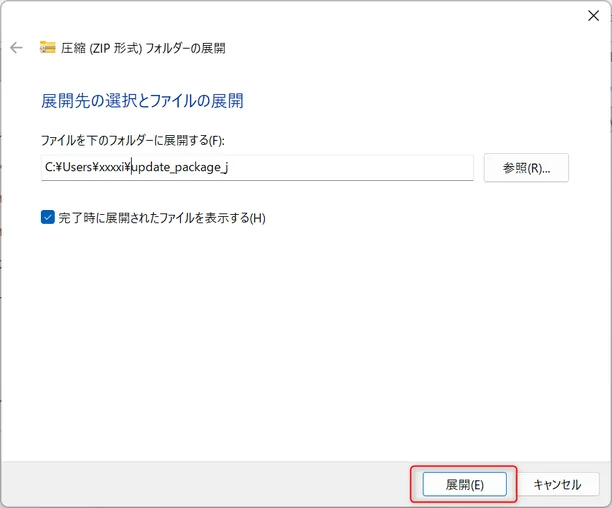
  3. Check the destination folder and click “展開” (Extract).
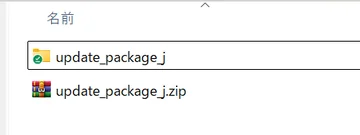
  4. When the “update_package_j” folder appears, you are ready.
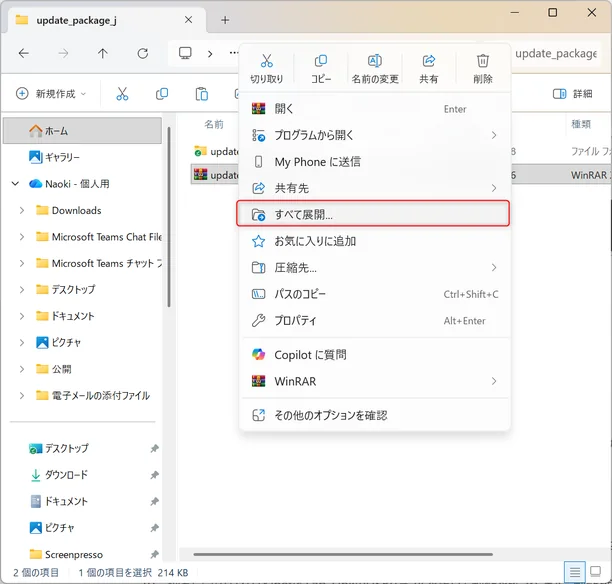
Right-clicking the ZIP file and selecting Extract All (すべて展開...)
Right-click the ZIP → “すべて展開...” (Extract All)
Extraction dialog: confirm the destination and click Extract (展開)
Confirm the destination → “展開” (Extract)
The extracted update_package_j folder
“update_package_j” means you are ready

STEP 2Check the COM port in Device Manager

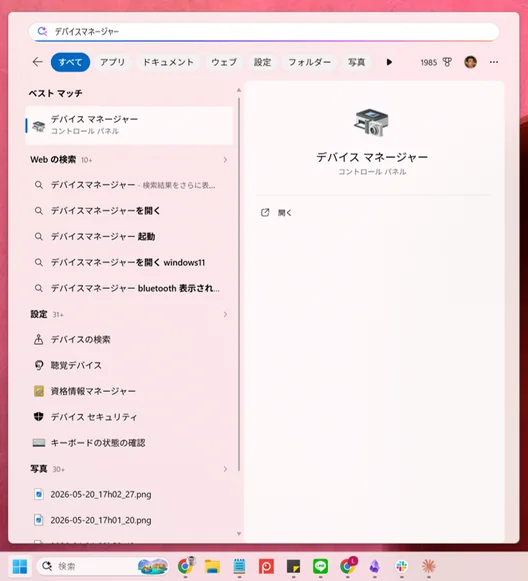
  1. Click the Windows logo at the bottom left of the screen and type “Device Manager” in the search box at the top.
  2. Click “Device Manager” in the search results to open it.
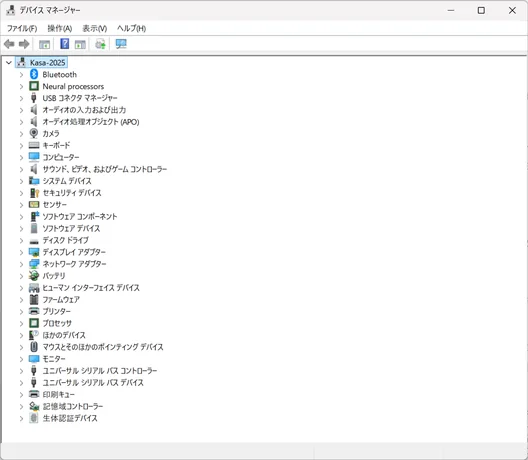
  3. At this point, “USB Serial Device (COM3)” is not shown in the list yet.
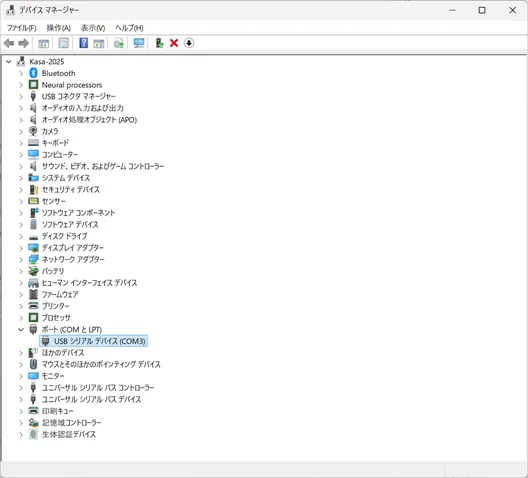
  4. Once you connect the dedicated sensor, “USB Serial Device (COM3)” appears under “Ports (COM & LPT)”. Note the COM number shown here (e.g., COM3) — you will use it later when selecting the port in the Updater.
Typing Device Manager into the Windows search box
Type “Device Manager” in the search box
Device Manager before connecting the sensor: no USB Serial Device shown yet
Before connecting: not shown yet
Device Manager after connecting: USB Serial Device (COM3) under Ports (COM & LPT)
After connecting: “USB Serial Device (COM3)” appears

STEP 3Connect the KINETIC LAB-Link

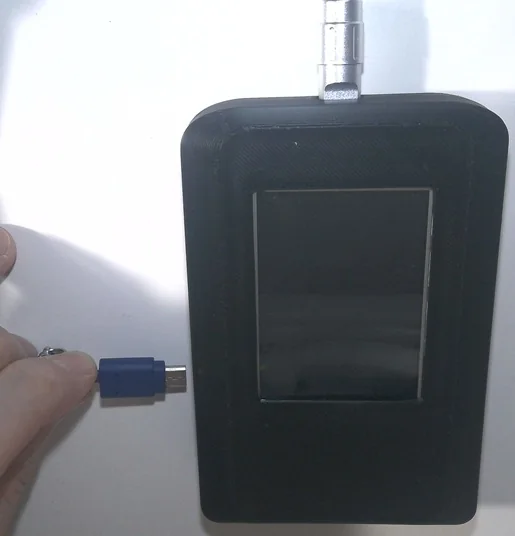
  1. Connect the USB Micro-B port on the LEFT side of the dedicated sensor to a USB Type-A port on your PC with the USB cable.
Caution: Do not use the USB Type-C port on the bottom (power only). Please be careful not to mix them up.
USB cable connected to the USB Micro-B port on the left side of the sensor
Connect to the USB Micro-B port on the left side

STEP 4Launch the Updater and select the COM port

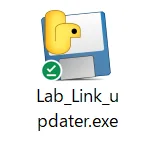
  1. Double-click “Lab_Link_updater.exe” to launch it.
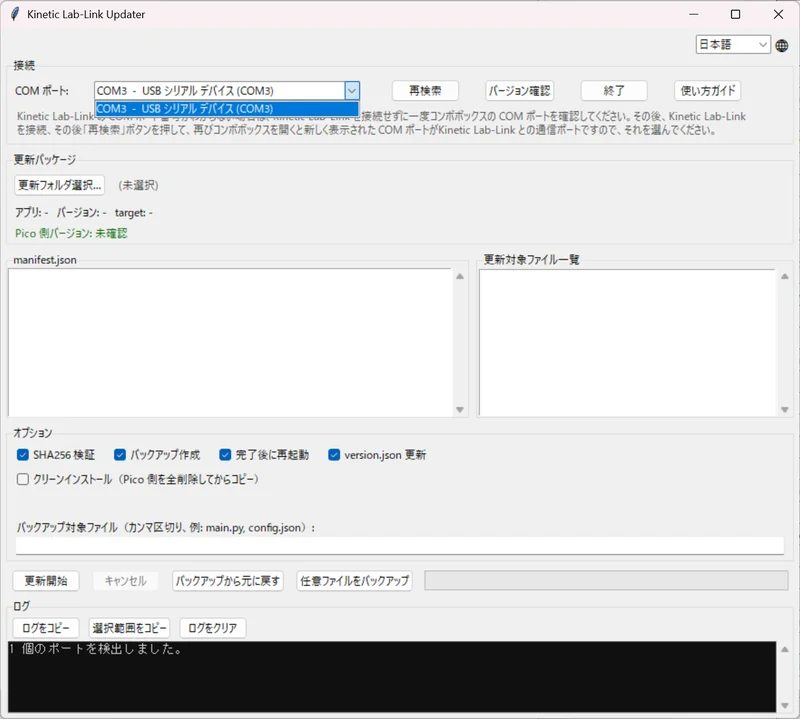
  2. Open the “COMポート:” (COM Port) combo box and select the KINETIC LAB-Link's COM port (e.g., COM3). If it is already selected, leave it as is.
  3. If you are not sure which port it is: check the combo box with the sensor disconnected → connect the sensor → click “再検索” (Rescan) → open the combo box again and select the newly added port.
Lab_Link_updater.exe icon
Double-click “Lab_Link_updater.exe”
Selecting COM3 in the Updater's COM Port (COMポート:) combo box
Select the sensor's port in “COMポート:” (COM Port)

STEP 5Select the update folder

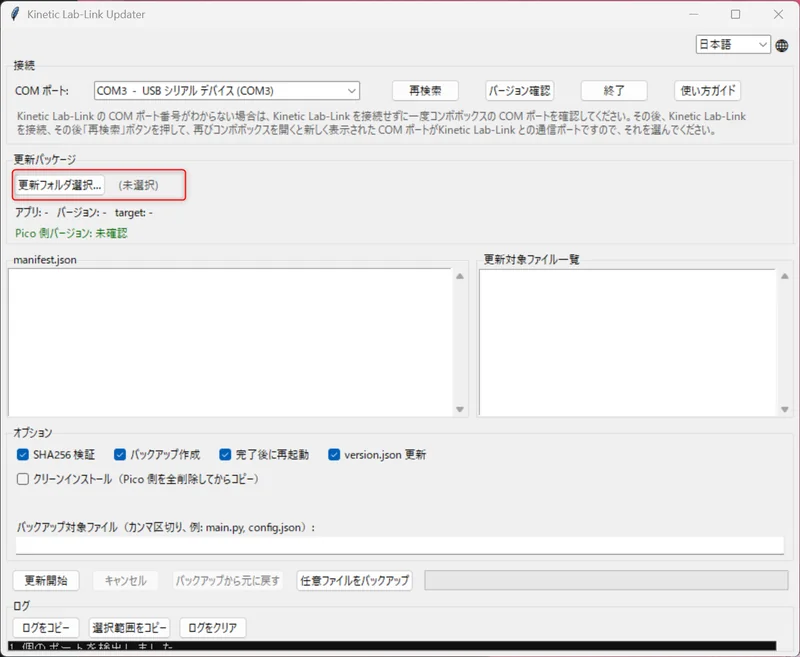
  1. Click the “更新フォルダ選択...” (Select Update Folder) button.
  2. Choose the “update_package_j” folder you extracted in STEP 1, then click “フォルダーの選択” (Select Folder).
The Updater's Select Update Folder (更新フォルダ選択...) button highlighted in red
Click “更新フォルダ選択...” (Select Update Folder)

STEP 6Check the update contents

Confirm that “manifest.json” and the list of files to be updated are displayed.

STEP 7Start the update

  1. Click the “更新開始” (Start Update) button. Leave the options at their defaults unless support has instructed otherwise.
  2. When the confirmation dialog appears, click “はい(Y)” (Yes).
  3. The log shows the update progress. The transfer takes several minutes.
Do not unplug the USB cable during the update.

STEP 8Confirm completion

  1. The log shows “=== 更新が正常に完了しました ===” (Update completed successfully).
  2. When the completion dialog appears, click “OK”.

STEP 9Verify sensor operation

  1. Unplug the USB cable, connect power via the USB Type-C port on the bottom of the dedicated sensor, and verify that the sensor works normally.
Do not close the Updater app until verification is complete.

STEP 10Close the Updater

If everything works properly, the update is complete. Click the “終了” (Exit) button to close the Updater.

HELPTroubleshooting

  • !If an error occurs: Click the “ログをコピー” (Copy Log) button to copy the log and send its contents to support.
  • !If the sensor does not work properly after the update: Reconnect the USB Micro-B port on the left side and use the Updater's “バックアップから元に戻す” (Restore from Backup) button to return to the pre-update state. Then contact support.
💬

Still having trouble?

Please contact us via the contact form, including the error message and log contents.